There’s a lot written about the Velocette starting procedure. In fact, every Velocette owner should consult their owner’s manual for the correct specific procedure. Below are the very basic steps without any jargon or technical terms. Those are more accurate, but hey, sometimes the experience of a novice may contain insights.
Why did it take me over ten years to master this? Well the mystique intimidated me; starting a Velocette seemed to require initiation into the arcane subject of how the engine worked. As in you can’t start the bike if you don’t understand what the motor is doing. Or, it’s not just application of weight, you have to work with the motor.
Great! What if I’m not an engineer or even a mechanic, just a girl who wants to go for a ride?
Well, that’s not the Velocette way. If that’s what you want, get a modern bike with an electric start!
Still want to delve into this subject? Okay here goes.
First you have to prepare the bike. It’s essential to be confident that your bike is set up as correctly as possible. The following steps are specific to starting a bike that is in working order.
1. Turn the gas on (there should be some in the tank!)
2. Turn the oil on (there better be oil in the bike!)
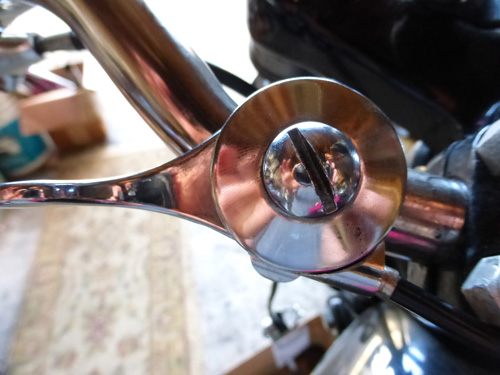
3. Set the Advance/Retard Lever to Retard. This retards the spark timing and will prevent the bike from kicking back at you. I’ve heard stories of grown men breaking legs or being launched 40 feet into the air because they did not take this precaution.
4. Get fuel into the carburetor. There are two primary ways of doing this. Which method you choose depends on the ground surface and your comfort with the weight as well as the bike. Some specific bikes prefer one method over the other.
Lean the bike to the right side for bikes with a remote float or
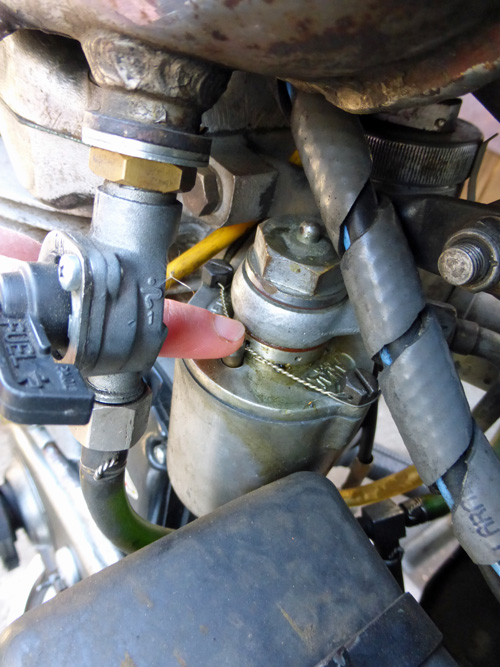
Tickle the float bowl (raises the fuel level in the float bowl)
Okay, once you’ve done all that, the bike is prepped and ready to go!
Next you the rider must supply the energy to overcome inertia.
Although the steps below seem straightforward there are many variables. Some people like to do this procedure while the bike is on the kickstand. Others perform the steps while standing next to the bike. I found a technique that enabled me to get the maximum effectiveness out of the kick after many hours of trial and error. But it can be done!
1. Find compression. This means to kick down on the lever until you feel resistance. At this stage, you can kick the lever with a kind of pumping action a few times. The location of the compression will move and you can put it into your preferred area. This has to be determined with experience.
2. Pull in the Compression Release. (Cute little lever under the handlebar on the left.)
3. Push the kickstart lever down smoothly and slowly enough to listen to what the motor is doing. You want to pass the first wheeze and begin the second. The sound is important! That’s the motor telling you when the cams open up, whatever they are.
4. This time allow the kickstart lever come back up with great focus. This is the big one! You have to maximize the effectiveness of the next kick. The best starting position is about 10 0’Clock, where your kick will have maximum effectiveness.
At this point you are communicating with the bike through that kickstart lever. Do not release it. Your foot and the kickstart lever need to stay connected.
5. Kick straight down. Use your weight, your muscle, what you got.
Ta Da!
Of course if it doesn’t work, then repeat the steps above.
Pay attention to what the bike is telling you.
Yes there are other variables (choke, throttle, etc), but they’ll have to be discussed in Advanced Velocette Starting


Don’t forget the last and most important rule.
The number of kicks required is directly proportional to the number of people watching.
It is all about suck, squeeze and bang, the blow looks after itself. And having spent a while this weekend kicking mine into life as part of the Belt Drive Project, oh why did I start? My right foot is not so happy. And worn ratchets, they’ll get presented to the cutter grinder presently. But for Honda’s, not knowing how it works. Sharpen Up!
Alan invokes the First Rule of Demonstrations.
“Set the advance retard lever” – great advice. Clockwise? Anti-clockwise?
It depends on how your bike was set up. On the one I’m currently riding, (a MAC), I marked neutral in fingernail polish. If there is any kickback, I move the retard lever clockwise a tiny bit. We’re talking quarter of an inch. Then I try again and adjust more as needed. Once I’m riding, I pull the advance retard lever all the way anti-clockwise towards me.
Retarded is when the lever is open towards you, pulling the iner cable out. Advanced is with the lever closed.
This is brilliant. Of all the articles i have read, this has to be the definitive method that works every time. That comment on listening for the start of the second wheeze is the absolute secret. You have my eternal gratitude. My bike wont fire on full retard either. The spark is just too late.
Great. Very heartening – I need that. But – the LE Mk II has a hand start (!). I bump start when it won’t cooperate by hand. Cheating, maybe, but it works.
David
PS I also keep bees. Might be a reasonable summer, fingers crossed.
It’s easy to start my Velo, just turn on the fuel and push the electric leg (starter) button and away you go, essential for a 75 year old with knee problems!